- Published on
- •👁️
MySQL 설치 및 설정
- Authors

- Name
- River
MySQL 설치 방법
MySQL을 설치하는 방법
MySQL 사이트 : https://www.mysql.com/
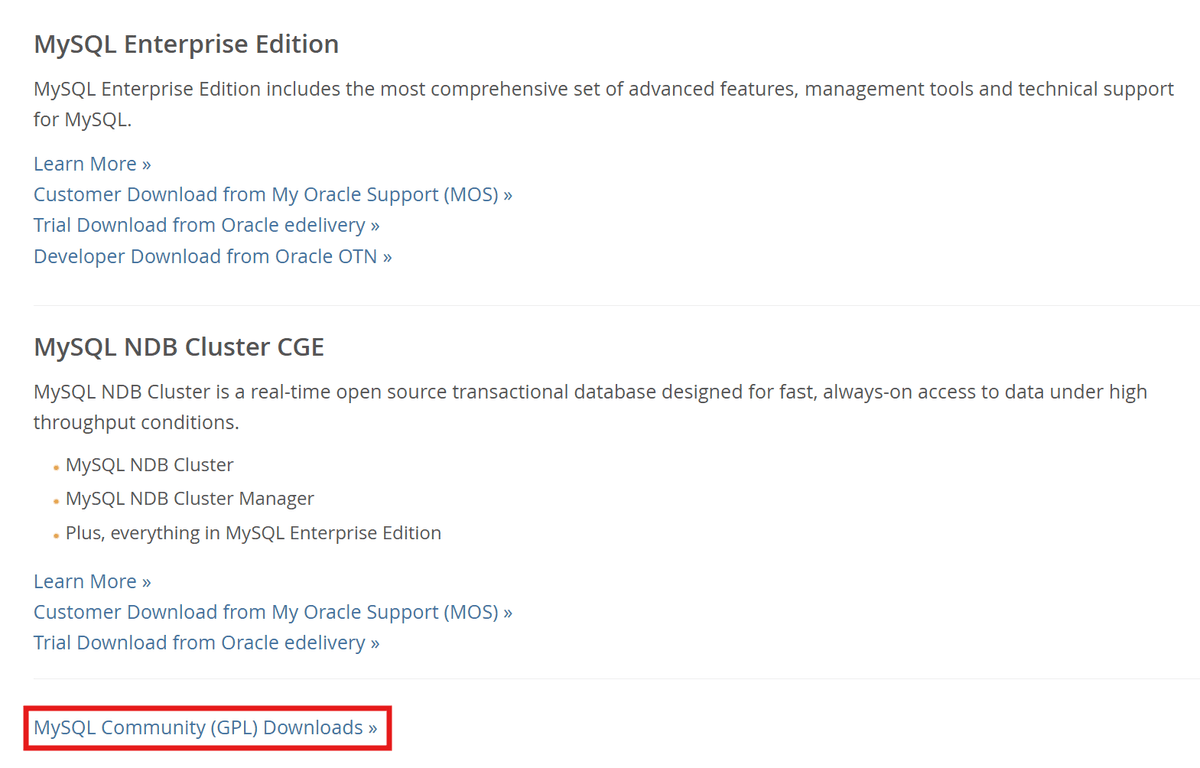
메뉴바의 Downloads 클릭 ⇒ MySQL Community (GPL) Downloads 클릭
MySQL Community Server 8.4.3 버전 LTS ⇒ Windows (x86, 64-bit), MSI Installer 다운로드
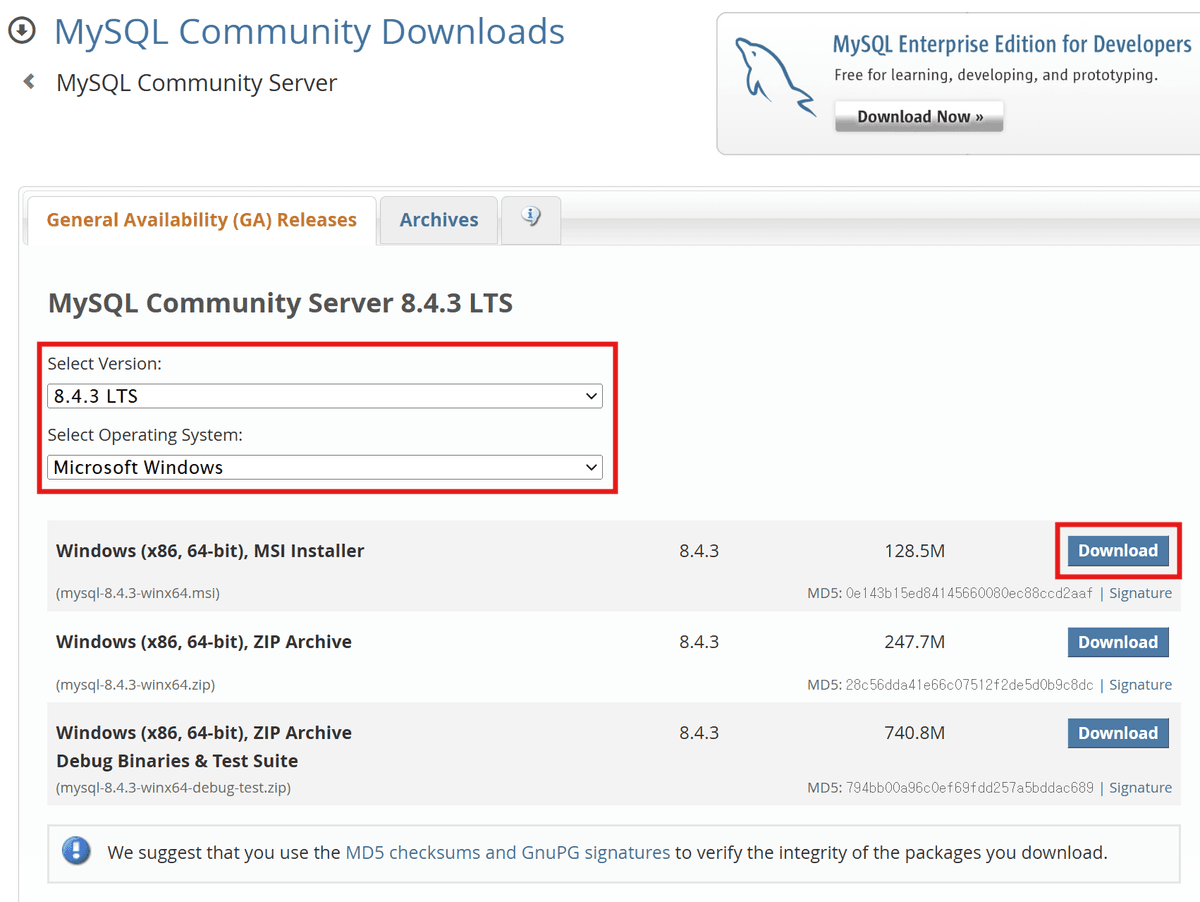
"No thanks, just start my download" 클릭 (로그인 필수 아님)
다운로드 받은 MSI Installer 설치 시작 (Complete 버전 설치)
MySQL Configurator
next ⇒ next ⇒ show advanced and logging options 체크 ⇒ next ⇒ 비밀번호 1111 ⇒ next ⇒ next ⇒ next ⇒ next ⇒ next ⇒ Sample Databases(둘 다 체크하기 (Sakila, World)) ⇒ next ⇒ (다른 버전 있다면 삭제) ⇒ execute 클릭 ⇒ next ⇒ finish
MySQL 환경 설정 및 시작하기 (CLI 방식)
명령 프롬프트
$ mysql
$ mysql⇒ (x) 경로를 찾지 못한다.
시스템 환경 변수 ⇒ 환경 변수 ⇒ 시스템 변수 ⇒ path
새로 만들기 :
C:\Program Files\MySQL\MySQL Server 8.4\bin- 설치된 MySQL 폴더 내부의 bin 폴더 위치
명령 프롬프트 창 닫고 다시 열기
- 환경 변수를 변경하면 다시 열어야 수정된 환경 변수를 활용할 수 있다.
명령 프롬프트
$ mysql ==> ERROR 1045 (28000): Access denied for user 'ODBC'@'localhost' (using password: NO)- 이렇게 나오는 것이 정상이다.
명령 프롬프트
$ mysql -u root -p(-p: 비밀번호 직접 입력)
$ mysql -u root -p Enter password: (설치할 때 설정한 비밀번호 : 1111) Welcome to the MySQL monitor. Commands end with ; or \g. Your MySQL connection id is 15 Server version: 8.4.2 MySQL Community Server - GPL Copyright (c) 2000, 2024, Oracle and/or its affiliates. Oracle is a registered trademark of Oracle Corporation and/or its affiliates. Other names may be trademarks of their respective owners. Type 'help;' or '\h' for help. Type '\c' to clear the current input statement.- 위의 명령어를 입력하면 비밀번호를 입력하라고 한다.
- 설치할 때 설정한 비밀번호를 입력하면 접속할 수 있다.
명령 프롬프트
$ quitor$ exit
$ quit- 나가기 명령어